Apply Credit towards open Invoices on Sage 50: Guide

If you are a small business that uses Sage 50 for accounting and invoicing, then you know how difficult it can be to stay on top of payments. One way to help manage customers’ payments is to apply credits towards open invoices. Applying credit is an easy way to ensure that all open invoices get paid in full and on time. In this blog post, we will discuss how to apply credit towards open invoices on Sage 50. We will walk you through the entire process step-by-step so that you can make sure your company’s finances are running smoothly. So let’s get started!
User Navigation
The various features of the Sage software make it one of the leading names in the business world today. Now, most of your accounting and financial aspects are well taken care of with the help of efficient software that ensures you are in ‘safe hands’. Some of the most remarkable features that set Sage apart include
- Better Business insight.
- Automated bank transactions.
- Account reconciliations
- To be able to import data with ease.
- Better budgeting and Planning.
- Paperless Office for Automated Reporting
So, you see, the above are some of the prime factors of the Sage software that makes it so popular. Likewise, it is the Invoicing feature of the Sage that is also worth a watch. Before we plunge into the Apply Credit towards open Invoices on Sage 50, let us take a look at what the Invoice is all about and why is it so important for your business.
What is an Invoice?
Essentially, an Invoice is a document that comprises records and the various transactions between the two parties involved. As simple as it might sound, nevertheless, an Invoice is usually generated with the appropriate consent of the two or more parties involved. Among the other applications, an Invoice is used for the purpose of buying goods or availing services.
Generating the invoice is important as helps take charge of your ‘accounts’ the right way. These are especially of great assistance when it comes to viewing your credit or in case of delayed payments. Other aspects of the same includes a request for the tendering or quotation process. The purchaser works by ‘tallying’ the specifications of the service or the purchase with the relevant requirements, the Purcahse order is issued.
Read More-: How to Apply AR Prepayment to an Invoice in Sage 100 ERP
This purchase order is used as a basis for the supplier or the seller the preparation of the services or goods. The other aspects of the purchase order also comprise the conditions for the purchase which include the terms and conditions for the payment. On the services or the goods are ready, the required invoice is created and generated. Finally, the invoice is used to move the transactions from the intended seller or buyer to the proceeding level ahead, or the finality of the goods or services being finally delivered.
Now, most might be confused about the Invoice, Bills and Reciept. Well there is quite a bit of a difference between each of these document in a precise manner. Let us take a look:
- The Invoice: As stated previously, this is a record of all the Sales that comprises of the various details of the transactions which includes the Price, the goods and the services sold. Also, the other details like the terms of payment including the amount due and the date of due are included. With the help of the Invoice one can easily help the process of filing of expenses, tax calculation and recording of the purchases.
- The Bill: There are quite a few similarities between the Invoice and the Bills, when it comes to the details. There are also places and instances when the two documents are used interhcnageably. However, the main difference between the two lies in the context of use. The invoice, in most cases is defined by the ‘Credit Period’ after which it can be used. Whereas in the case of a Bill, it comprises of immediate payment implication. There are times when a document is used by the Supplier and is called the Invoice, and the same record is used by the buyers and is called the bill.
- The Reciept: Now, once again the term receipt is often times confused with the Bill and the Invoice. However, this has a distinct characteristic and function. The receipt is used to acknowledge the payment that is received once the payment of the invoice or the bill has been accomplished. However, the term can be used interchangeably with that of the invoice when one needs to claim the business expenses.
Now, that you know exactly what an Invoice is all about, let us take a look at the feature included in the Sage software.
Apply Credit towards open Invoices on Sage 50
In order to be able to apply the credit towards the Open Invoice on Sage 50, one needs to follow the below steps:
- Launch the Accounts Payable
- Go to Main
- Next, click on Manual Check and Payment Entry
- Here enter the Bank Code
- The bank code entered does not affect the entry because it does not post to any General Ledger Account.
- Go to the ‘Check No Field’
- Here, you need to type ‘APP’ and any number from 1 to 999.
- However, the check amount field has to be maintained at ‘Zero’ and cannot be changed.
- Next, click on the header tab
- Now click on the Vendor No Field
- Here you need to select the vendor number to apply the credit memo.
- Click on the Lines tab
- Next, go to the invoice No field.
- Click select the credit memo to be applied.
- At this point the credit-invoice details will appear
- Next, go to the Invoice No field
- Click on the invoice to Apply the credit memo.
- The Invoice details appears.
- Go to the Invoice Amount field
- Here, change the invoice amount
- This will reflect the positive amount of the Credit memo is required
- The check distribution amount should be maintained at Zero.
- Now click on Accept.
- Finally Print and update the Manual Check Register.
- And you are done.
Steps to Apply the Credit Memo or the Pre-Payment to an Invoice
There are times and cases, when one needs to apply the credit memo or the pre-payment to an invoice. This could be because the customer or the nature of the services involved requires you to do so. So, how do you do this? Well here goes:
- Go to the Accounts Recievable
- Click on Main
- Next click on Cash Reciept Entry
- Now, create a New Cash Reciepts Deposits with $0 amount
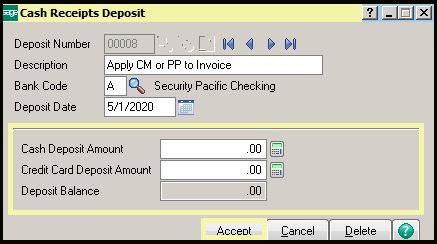
- Next, select the Customer Number
- As for the Check No, you need to enter ‘APPLY’ or the date.
- Maintain the amount received at $0
- Now, go to the Lines Tab
- Here, select on Credit Memo or Pre-Payement.
- Next select the Invoices that you wish to apply the above to.
- And you are done.
How to Edit or Create Invoices and Credit Notes
So, now that you know the importance of the Invoice, how do you generate one form your software? Well, here are the steps:
Step 1: to Set the Details Tab
You have to start by setting up the default tab. This helps save time and also helps credit the credit formats required for the business. To do so, you need to:
- Go to the Invoicing tool bar
- Click on New/Edit Invoice
- This will activate the drop-down menu list
- Now select the type and the format required by your invoice.
- In order to Create the Product Invoice select the Invoice from the drop down list
- Likewise from the Format drop-down list select Product.
- At the top part of the Window you need to enter the details about the invoice or credit.
- The Main Invoice details are something like this:
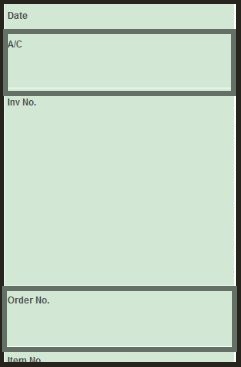
- In addition to the above criteria, there is also the RATE category for the Accounts Professionals, as required for the foreign currency.
- Here you need to enter the Items that are Sold, one by one. This will automatically update to the Invoicing Window in the Product Record.
- The Product Invoice looks like below:
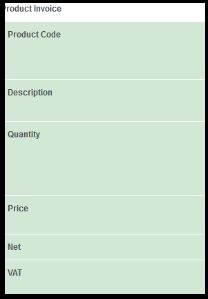
The Service Invoice comprises of the following features:
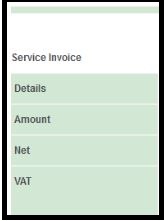
In the above window, the Details line can be further elaborated by clicking on F3
- Now, after you have entered the relevant details
- Go to the Deduction area at the bottom of the window, to apply the Value discount.
- Go to the Description box and compete for the details in the Edit Item Line Windows as required:
- The description of the discount should be up to twenty-five characters.
- As required one can also enter comments of up to sixty characters.
- Likewise, enter the Discount percentage of the value. This will allow the discount percentage and value to reflect
- Finally check the Total.
- Likewise, one can also check out the various options that are available at the Foot of the Invoice. These can be completed as required. Some of the features available are:
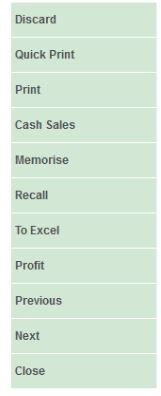
- Finally complete the entire process by clicking on SAVE.
Steps to Delete an Invoice
In order to delete an Invoice, you can follow the below steps:
- Select the Invoice/Credit notes that one needs to delete from the Invoicing Window.
- Click on DELETE
- In order to delete the invoice or credit note, click on YES.
- In case you do not want to do the same click on NO.
- Likewise, you will continue to get warning or prompting messages in order to complete the process of deletion as and when required.
Inorder to Record the Overpaid Payment for the Customer’s Invoice
To do so, you will need to follow the below steps:
- Go to the Upper right corner of the window
- Click on Create Menu.
- Select the Recieve Payment.
- Go to the Recieve Payment option
- Click on Customer.
- Go to the Outstanding Transactions
- Here you need to check the mark on the payment invoice required to pay.
- Now, go to the Amount Received and enter the correct amount as received from the Customer this should also include the Overpayment.
Likewise one can also use the Check to Record in order to Minimize the Refund of your bank’s balance and also Offset the Customer’s overpayment:
- Go to the Top Right Corner of the Screen.
- Click on the Plus(+) Icon.
- Go to the Suppliers
- Click on cheque.
- Here, go to the Payee column
- Click on Customer.
- Go to the Category column
- Click on Accounts Receivable
- Here, you need to enter the overpaid payment in the Amount column
- Click on Save
- Click on Close
Read Also-: Transaction Manager for Sage 50 Service
Conclusion
So, there you have it friends these are some of the tips, steps and solutions when you need to Apply Credit towards Open Invoices on Sage 50. Invoice is an important feature of the Sage software that allows both parties involved to take a closer look at the various details of the transaction. However, if you still encounter any problems while doing so, be sure to reach out 1800 964 3096 to our team of experts and we will be more than happy to help you out.
Accounting Professionals & Specialized Experts
Want quick help from accounting software experts? Get in touch with our team members who can install, configure and configure your software for you. Proficient in fixing technical issues, they can help you quickly get back to work whenever you encounter an error in Sage software. Our team is available 24/7 365 days to assist you. To get in touch.
💠Frequently Asked Questions💠
What is the meaning of ‘Applying a Credit to an Invoice’?
This is also known as a Credit note or Credit Memo. This refers to the notation detailing money credited back to the original invoice. One of the most common examples of a credit invoice is the Customer Refund. This feature is applied to many aspects of transactions
How to Pay an Invoice with a Credit?
It is rather a straightforward and preferable method of paying bills with credit cards. This is usually paid online or via phone. Either of the methods allows you to give the credit to the company, along with the expiration date, the billing zip code, and the security code. One can make the most of this feature as the payment is rather instant
How to apply a Credit to the Invoice in Sage?
To do so, one needs to:
🔹 Go to the Header option
🔹 Go to the Vendor No field
🔹 Here select the vendor Number in order to apply the Credit Memo.
🔹 Go to the Invoice No field
🔹 Click on the Credit Memo that needs to be applied.
🔹 This will automatically display the invoice information.
🔹 Go to the Invoice No field
🔹 Click and select the Apply Credit Memo
How does one Credit an Invoice?
The information that is included on the Credit notes comprises of:
🔹 The words Credit Note at the top
🔹 The customer’s information
🔹 Your Business Information
🔹 The date of Issue
🔹 The Credit Note number
🔹 The original Invoice reference number
🔹 The item description, prices and quantities
🔹 The total amount credited
