Use Sage 50 Network Installation Manager
Updated On: August 4, 2025 12:31 pm

The Sage 50 Network Installation Manager is a software application designed to simplify the process of installing and configuring Sage 50 on a network. It provides a central location for managing network settings, user permissions, and other aspects of the installation. The Network Installation Manager also allows for easy updates and upgrades to the Sage 50 software.
User Navigation
Accounting Professionals & Specialized Experts
Want quick help from accounting software experts? Get in touch with our team members who can install, configure and configure your software for you. Proficient in fixing technical issues, they can help you quickly get back to work whenever you encounter an error in Sage software. Our team is available 24/7 365 days to assist you. To get in touch.
Do you also looking for the solution to install the Sage 50 on the network and also on multiple computers simultaneously?
Here is the solution that is Sage 50 Network installation manager that helps you in installing the program on the network. Also, helps you to install on multiple computers in a smooth manner. This makes your work easy and done without any interruptions. So use the Sage 50 network Installation Manager to do your work fast and saves your time.
Tips to Use Sage 50 Network Installation Manager
- For network install, you have to first install it on the Server.
- Network Installation Manager won’t work on wireless networks.
- Install the program on each computer using Sage 50 Network Install Manager that is using the Sage otherwise your computer is in the Terminal Sage environment.
- Using this, you can easily install the program on many computers parallel.
- In this, start installation on the first device then move to another one.
- In the case of using Sage installer, the destination folder is created where you have extracted the files of the program.
- Set the Windows permission correctly if you are operating it in the domain environment.
- If you are installing it using a virtual machine or remote access then follow these installation steps:-
- Open the RUN window.
- Type %temp% and press Enter button.
- Now double-click on the RarSFX0 folder.
- Then double-click on the Peachw folder.
- Open the Install folder.
- Right-click on the Setup.exe file then select option Run as Administrator.
Also Read: How to Install the Sage 50 Connection Manager on the Server?
Which Installation is Right For Me: Single-User or Network?
Now, let us take a look at what works the best for you:
Network:
In this case, more than one system will be networked, and multiple users can gain access to the Sage 50 company data at a single go. For this, check the Network installation instructions.
Single or Stand-Alone Computer:
In this case the Sage 50 is installed on only one system, Sage 50 company data resides on that system, and the data is accessed only from that one system.
Installing Sage 50 on a Network
Follow these instructions if more than one computer will be networked so that multiple users may access your Sage 50 company data at once:
Note: You must first install Sage 50 on the server computer. Then, install Sage 50 on each workstation. Sage 50 workstations connect to the server and access transactions and records stored in the Company Data files.
Quick Tip for Network Installation
- Once you install Sage 50 on the server, the user will get instructions for the process of installation on the workstations.
- The user can utilize a link on these instructions to easily install on their workstations.
- Once can also install on multiple workstations simultaneously.
Note: Sage 50 Pro Accounting is not multi-user compatible and can only be installed on a single Computer.
Installing on the Server Computer
Disc Installation:
- In case you have a Sage 50 installation disc, insert it in the disc drive.
- On Windows 10 or 11, you can type D: in the search box (substitute the appropriate drive letter for your disc drive)
- Now, click Enter.
- Go to the disc and double-click Setup.exe.
- Now, Download and install If you downloaded Sage 50, double-click the Sage 50 EXE file.
- This file is downloaded to your systems’ Desktop by default.
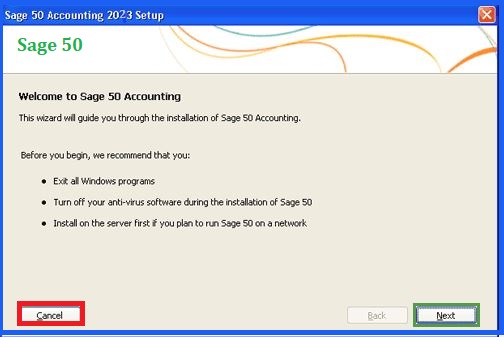
Select Install Sage 50 Accounting:
Note: We recommend that you turn off your antivirus software now during the installation of Sage 50. You can turn it back on after the installation is complete.
- Next Read and accept the License Agreement.
- WithIn the Firewall Settings, it is recommended that you select Auto-Configure the Windows Firewall to allow install and run Sage 50.
- Likewise , you can also manually configure your firewall.
Note: In case you receive any warnings from your firewall software during the installation, select Allow or Unblock to continue with the installation.
- Now, enter the serial number. The serial number can be found on your installation disc case or in an email that has been sent to you.
- WithIn the Single system or Network, select No. Sage 50 company data will be shared on a network and accessed by multiple users. This will make sure that you install correctly for multi-user setup.
- WithIn Sage 50 Company Data Files Storage, select This computer is the server.
- WithinIn Install Options, you need to specify where you want to put the Sage 50 program and company data files.
Note: In case your system does not meet the minimum system requirements, you will receive notification of this at this point.
- Sage 50 Program Files: We recommend that you accept the default location for your Sage 50 program files. The user can click Browse and select a different location, if required..
- Sage 50 Company Data Files: It is recommended that you accept the default location for yourSage 50 company data files. The user can click Browse and select a different location, if required.
Note: Company data files must be stored in a shared folder on the server. When you install Sage 50 on your workstations, you’ll connect to this shared company data location. After installing, you can share company data.
- Now, Click Install to install Sage 50. This might take a few moments
Sharing Company Data:
Share your company data folder, in case it has not already been shared. By default, this folder is named “Peachtree”.
- Start by Clicking on Share the folder inorder to open Windows Explorer with the folder highlighted.
- Next Right-click the folder and select Properties.
- Within the Sharing tab, you need to select Share this folder.
- The user might need to select Advanced Sharing to get
- the Share this folder option, depending on your version of Windows.
- Note the Share Name. You will map to the share when installing on your workstations.
- With In Sharing Company Data, click View important information you will need when installing
- Sage 50 on workstations.
- Now, Follow the instructions for installing on workstations and for connecting workstations to the server after you’ve finished installing on the server.
- Next Click Next to install. Once the installation is complete, the Installation Completed window appears. It is recommended you activate now if you haven’t already done so. Read the Release Notes for brief information about new features in this release.
- Click Finish to complete the installation.
- Important information about installing on your workstations will appear after you click Finish.
Also Read: Sage 50 Remote Data Access
Installing on Workstations Using the Network Installation Manager
- By the end of the installation on the server system, you will get instructions for installing on your workstations.
- These instructions are saved on the server in a file on the desktop called Sage 50- Network Installation Manager Instructions.htm.
Note: The network installation manager will NOT work over wireless networks.
- You can use the network installation manager to install on multiple computers at the same time. Get the installation started on one workstation and then move on to the next one.
- If you have any problems using the network installation manager, you can still install Sage 50 on each workstation using the installation disc or downloaded files.
1. You need to get these instructions to each computer where you are going to install Sage 50 by doing one of the following:
- Email the file to an account you can access from the other computers.
- Save the file to a USB drive and take it to each computer.
- Print the instructions and take them to each computer.
2. On each computer, open the file and click the link shown in Step 2. This will start the installation on that computer. If the link doesn’t work or if you printed the instructions, you can copy/paste or type the link location in Search>Run or in Windows Explorer.
3. In Sage 50 Company Data Files Storage, select A different computer on the network is the server and will store Sage 50 company data. Confirm that Sage 50 has already been installed on the server.
4. When the installation begins, verify the information on the Client Install screen. The default information on this screen should be correct, but you can change it, if it’s not.
5. Click Install.
6. When the installation is complete, the Installation Completed window appears. Select or clear the options as wanted. Then, select Finish to complete the installation.
Installing on Workstations using the Installation Disc or Downloaded Files
Follow these steps if you need to install Sage 50 on each workstation using the installation disc or downloaded files.
- Make sure you know the drive and directory of the Sage 50 company data files
- located on the server computer before you begin installation.
- Note: It is easier to install Sage 50 on your workstations using the network installation manager.
- Using the install disc or downloaded files to install on your workstations is only recommended if you cannot install using the network installation manager.
1. Browse to your computer’s Desktop and double-click the Sage 50 EXE file. This file is downloaded to your computer’s Desktop by default.
Note: You can get the downloaded file onto each workstation several different ways.
- Download the file to each computer.
- Burn the downloaded file onto a disc.
- Copy put it on a USB drive to take the file to each computer.
- Place the downloaded file out on the network where it can be accessed from each computer.
- Then copy the downloaded file to each computer.
2. Select Install Sage 50 Accounting
Note: We recommend that you turn off your anti-virus software now during the installation of Sage 50. You can turn it back on after the installation is complete.
3. Read and accept the License Agreement.
4. In Firewall Settings, we recommend you select Autoconfigure the Windows Firewall to allow install and run Sage 50; however, you can manually configure your firewall. Important! If you receive any warnings from your firewall software during the installation, select Allow or Unblock to continue with the installation.
5. Enter the serial number. The serial number can be found on your installation disc case or in an email that was sent to you.
6. In Single Computer or Network, select No. Sage 50 company data will be shared on a network and accessed by multiple users. This will ensure Sage 50 knows you are installing in a network environment.
7. In Sage 50 Company Data Files Storage, select A different computer on the network is the server and will store Sage 50 company data. Confirm that Sage 50 has already been installed on the server.
8. In Install Options, specify where you want to put the Sage 50 program files. The path MUST point to a local drive.
9. Select the network location where the Sage 50 company data is stored.
10. Click the drop-down arrow to display a list of shared folders on your network. You should see the folder that you shared when Sage 50 was installed on the server. By default, this folder is named “Peachtree”.
11. Click on it to select it.
Also Read: Fix Sage 50 Cannot Open Company File Error
Sage 50 Installation Instructions
Before you Start, you Need to:
- During the installation of Sage 50 Accounting, the user will be asked for their serial number.
- This can be found on your install disc case or in an email that was sent to you from Sage.
- Next you need to Review the Sage 50 System Requirements to make sure that Sage 50 is compatible with your system.
Some Factors about Upgrading:
- In case you are upgrading from an earlier release of Sage 50, you can select to:
- Install the new release over the old release.
- If you want to install over the previous version, then your company data will NOT be overwritten.
- Once you open the company for the first time with the new release, the Conversion Wizard will automatically update the data files to work with the latest release or Install within a new location on the system.
- Retain the previous version of Sage 50. If you wish to keep the older version, but convert
- Your company data to the latest release, you will NOT be able to access that data with the old release.
Installing Sage 50 on a Single Computer
To install Sage 50 on a network, you must first install your Sage 50 accounting software on a computer where you want to store your Sage 50 company data files. For this
- Double-click on Sage50_2015.exe file and click Install.
- Read and accept the license agreement.
- Click Yes to on the message screen to automatically let Sage 50 set your firewall. Alternatively, you can also manually configure your firewall.
- In case you receive a warning message from your firewall software during install, select Allow or Unblock.
- Now enter the serial number has been sent to you in your email.
- On the Network window, select Yes to run Sage 50 on a single computer.
- Select the program files location. This must be a local drive (usually C or D).
- Now click Install to install Sage 50.
- Once you have finished installing Sage 50 on the server computer, you’ll be provided with options on the summary screen to use network manager to install Sage 50 on remaining computers.
- Check the option box and click Install.
- Your Sage 50 software will be installed on the network server.
- In the background Sage will also create a copy of the installation files on a shared folder on the server.
- In addition to the installation files, Sage will also add a client installation file that will help automate the installation process on each network computer.
- At the end of the process, you will receive a text file that will contain the location of the installation folder on the server along with the instructions on how to use it to install Sage 50 on other workstations.
- Since the installation file has been copied on the server, you would no longer need the installation CD to perform Sage 50 installation.
- Now from the next workstation, open the folder where Sage 50 installation file has been saved and run the client installation file.
- Click Install and the Network Installation Manager will do the rest for you. It will download, install, and upgrade Sage 50 software on this computer on the basis of settings defined by the server installation. These include:
- The location of the setup files
- The location of the data path
- The location of the company data folder
- The serial number of the product, required for installation and registration.
Once the installation process starts on this computer, you can move to the next workstation to start the installation process, without the need to wait for the process to finish on one computer. This way, with the help of Network Installation Manager, you can simultaneously install Sage 50 on multiple computers, something that was not allowed earlier.
Installing Sage 50 On a Single/Stand-Alone Computer
The User will need to follow these instructions if they need to install Sage 50 on only one system and the Sage 50 company data will reside on that same system and be accessed only from that one system.
- Disc installation: In case you have a Sage 50 installation disc, you need to insert it in the disc drive On Windows 10 or 11, you can type D: in the search box (substitute the appropriate drive letter for your disc drive), and then click Enter.
- Now go to the the disc and double-click Setup.exe. Download and install If you downloaded Sage 50, double-click the Sage 50 EXE file. This file will be downloaded within your system’s Desktop by default.
- Now, click select in order to Install Sage 50 Accounting.
Note: It is recommend that you turn off your anti-virus software now during the installation of Sage 50. You can later turn it back on after the installation is complete.
- Next you need to Read and accept the License Agreement.
- Go to the Firewall Settings, it is recommended you select Autoconfigure the Windows Firewall to allow install and run Sage 50; however, you can manually configure your firewall as well.
Note: If you receive any warnings from your firewall software during the installation, select
- Allow or Unblock to continue with the installation.
- Next enter the serial number. The serial number can be easily located on your installation disc case or in an email that was sent to you.
- Within the Single system or Network, click select Yes, this will be the ONLY computer running Sage 50.
- This will make sure that you install correctly for single user setup.
- With In the Install options, you need to specify where you wish to set the Sage 50 program files.
- Next, Enter the appropriate path here or leave it set to the default. The path MUST point to a local drive.
- The user can accept the default location for your Sage 50 company data files or you can click Browse and select a different location.
Note: If your system does not meet the minimum system requirements, you will receive a notification of this at this point.
- After the Installation has been Completed, the user needs to Select to start Sage 50 Accounting and read the what’s new.
- Next, click Finish to complete the installation.
Note: You may be prompted to restart your computer after installing Sage 50. Save your work and close any open programs before you do so.
Mapping a Drive to the Server Computer
In case you are not able to locate the correct shared folder for your Sage 50 company data files, it is generally because the workstation has not been mapped to the server system that stores the Sage 50 company data files. Here are the general steps for mapping a drive:
- To map the drive where the Sage 50 company data files are stored.
- Now click Find a Computer within the Company Data Files Location workstation installation screen.
- This will launch the Microsoft Windows Map Network Drive window.
- One can also launch this window directly from Windows Explorer.
- Next, click select the drive and folder within the server that has been shared when you installed Sage 50’s company data files.
- Ensure that Reconnect at logon has been selected.
- In case not selected, you can lose your connection to the data files whenever you log out of this computer.
- Finally, Click Finish.
Conclusion:
In this article, you get all the information related to the Sage 50 installation on the network and also how to use Sage 50 Network Installation Manager to make your work easy and convenient. In case if you have any questions or facing any issues connect with the Sage helpdesk expert team.
Frequently Asked Questions:
What level of Access do users required and which folder sharing is required for the Sage 50 Network Installation?
The level of access users have is full access to the shared folder in order to run the Sage software successfully. The folder that you have to share is directly before the data path folder. As the user require to access the data path also.
What settings of security permissions are required on the standalone computer for Sage 50 Network Installation?
1. Firstly, go to the data path
2. Then select the folder in which you have company files
3. Right-click on the selected folder and click on Properties option
4. Then go to the Security tab
5. Check that Administrators and Systems must have full control
6. In the end, click on the OK button.
How to correctly set the Data File permissions for Sage 50 Network Installation Manager?
Here some steps to correctly set the data file permission for Sage 50 Network installation Manger:
1. Go to the shared folder then right-click on it and select the Properties option
2. In the Sharing tab, click on Advanced Sharing
3. Then select the checkbox Share this folder
4. Select the permissions and click on the Add button
5. Also, add the System group
6. Click on the option Check Names and then click OK button
7. Provide Full Control to the user then click the OK button and again click the OK button
8. Again, you are in the Security tab; verify you have given Full access and then Click OK button.

Change Installed Version of the Program in Sage 50
With its incredible set of tools and functions, the Sage 50 software has captured the attention of the corporate and accounting...

Install Sage 50 CA on Cloud Server
Sage 50 cloud accounting is payroll and accountancy products built for small and medium enterprises. A lot of users want...

Sage 50 Canada Edition Installation Guide
Canadian version of Sage 50 2023 provides enhanced functionality, such as a better flexible payroll feature and streamlined reporting capacities....
 ChatGPT
 Perplxicity
 Claude
 Gemini
 Gork
Gork