Migrating Payroll Data in Sage 50: Complete Guide
Updated On: September 2, 2025 7:31 am

Have you decided to change your third-party payroll provider and switch over to another in quest of better accuracy, increased efficiency and cloud capabilities? But have you wondered what would happen to your payroll data when you switch providers?
User Navigation
Well, this bothers most users as they will need access to both historical and current data, quarterly returns, employee information, annual reports (W-2s) and so on. If this thought is bothering you too, you are at the right place. In this article, we will discuss what details you need to provide when migrating payroll data in Sage 50 and how to preserve your payroll data while switching providers.
Accounting Professionals & Specialized Experts
Want quick help from accounting software experts? Get in touch with our team members who can install, configure and configure your software for you. Proficient in fixing technical issues, they can help you quickly get back to work whenever you encounter an error in Sage software. Our team is available 24/7 365 days to assist you. To get in touch.
Let’s proceed then!
When to migrate payroll data in Sage 50
- To ensure your Full Payment Submissions (FPS) year-to-date values match HMRC records, follow these steps:
- Migrate your data at the right timeStart the migration at the beginning of a new tax month or tax quarter.
- Complete all pay runs in your old softwareComplete all payroll runs before switching to Sage Business Cloud Payroll.
- Enter payroll totals in SageBased on how often you pay HMRC, enter your total payroll values in Sage Business Cloud Payroll up to your migration date.
- Know your tax periods
- A tax month runs from the 6th of one month to the 5th of the next.
- The first tax quarter runs from 6 April to 5 July, then continues in three-month cycles.
Example:
Suppose you’ve already processed the first two weekly pay runs of the current tax month in your old payroll software. In this case, you should:
- Complete the reporting period: Finish all remaining weekly pay runs for that tax month in your old payroll system.
- Submit reports online: Make the required online submissions from your old system to HMRC.
- Migrate at the right time: Move to Sage Business Cloud Payroll at the start of the next tax month or tax quarter.
Prerequisite to start migrating payroll data in Sage 50
Collect these details from your old payroll system:
Note: Accuracy is essential to keep your reporting consistent with HMRC records.
- P11 reports-
- P11s provide the totals for PAYE, National Insurance (NI), Student Loan deductions, and statutory payments that need to be entered.
- A P11 is required for every employee in the current tax year, including leavers, new starters, directors, students, and casual staff.
- P45 or P46 information-
- For employees who joined during the current tax year, collect their P45. It contains pay and tax figures from their previous job.
- Start dates-
- Record the start dates of all current employees.
- Leaver dates-
- Record the leaving dates of employees who left during the current tax year.
- Statutory payments information-
- Note year-to-date (YTD) values for statutory payments. You can find absence dates and average weekly earnings (AWE) in the P11 report.
- Directorship details-
- Record the appointment date for directors.
- RTI Pay ID Requirements- Use the correct RTI Pay ID for each employee if you have already sent their information to HMRC.
- Entering the wrong ID can create duplicate records with HMRC.
- If your old payroll system did not use RTI Pay IDs, create new IDs of your choice.
- Tell HMRC you are changing payroll software and do not have the original RTI IDs.
- P32 reports-
- Collect P32 reports from your old payroll system for all pay runs in the current tax year. These reports record statutory pay and any employment allowance claimed.
- Include Class 1A Employer’s National Insurance on redundancy payments over £30,000.
- Keep all P32 reports for your records.
- Detailed Reports-
- Provide detailed reports if you made termination payments over £30,000 to more than one employee in a single P32 period.
These reports show a breakdown of the Class 1A Employer’s National Insurance paid for each employee.>
Also Read: Migrate From Sage 50 to Sage Cloud
Setting up for migrating payroll data in Sage 50
When you first log in to Sage Payroll, you’ll need to enter your company details. Then choose how to add your employee information.
Tip: You can stop setup at any time. Select Save, then Next to continue later.
Enter company details:
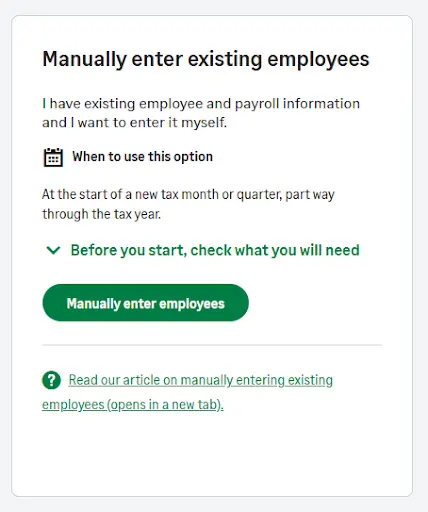
- On the Get started with Payroll screen, enter your company details and select Submit.
- To add employee information yourself, choose Manually enter employees.
Enter P32 details:
Set up your P32 reporting details with the following options:
- P32 Reporting Frequency- Depending on your configuration, you can decide whether to pay HMRC on a monthly or quarterly basis.
- If unsure, contact HMRC’s payment enquiry helpline.
- P32 Payment Method- Select whether you’ll pay HMRC by cheque or bank transfer.
- Last completed P32 reporting period- Select the last tax period you completed and paid to HMRC in your previous payroll system.
- Your first pay run in Sage Payroll should begin at the start of the next reporting period.
Set up a pay calendar:
- By selecting the pay frequency, you may decide how frequently to pay your employees.
- For each pay frequency, choose the exact day of the week or month for payment.
- If a payday falls on a weekend or public holiday, Payroll will move it to the previous working day.
- Tick the Avoid Public Holidays and Weekends box, then select Next to continue.
Add employees
Select Add Employee and fill in the required details. For each additional person you need to hire, repeat these steps.
Personal details
Enter Employee Details:
You’ll need the following information:
- Forename(s)*
- Surname*
- NI Number
- Date of Birth*
- Gender*
- Address (You must complete Street 1 and Street to prevent any future HMRC or pension submission errors)
- Telephone number
- Email Address
Tax details
Add an existing employee – tax details.
Opening balances
Add an existing employee – opening balances
Enter employer values
Enter the total Employer Contributions you’ve received so far for statutory payment recovery and compensation, such as Employment Allowance.
Make sure this information is entered before completing your first pay run.
Go to Settings > Migrate Payroll Data – Employer Values xxxx/xx or choose Next Steps in the Migrate Payroll Data process to proceed.
Eligible for Small Employer’s Relief-
- Specify if your business qualifies for Small Employers’ Relief.
Statutory Pay Recovery Values-
- Enter the amounts you reclaimed in your old payroll system up to your migration date.
- Small employers can reclaim 100% of statutory payments under Small Employers’ Relief.
- Other employers can reclaim 92%.
- You can find these amounts in the Employer Payment Summary (EPS).
- These amounts reduce your PAYE, NIC, and Student Loan liabilities to HMRC.
Statutory Pay Compensation Values-
- Small employers can receive an additional 3% relief from HMRC.
- You can reclaim statutory payments you paid to employees during the tax year.
- Record the compensation amounts you received from HMRC.
- Enter only the values up to your payroll migration date.
Employment Allowance values-
- If you claimed Employment Allowance in your previous payroll system, make sure to enter the allowance amount into Payroll.
Allowance Applied-
- Record that you claimed the allowance in your old system.
- From the Allowance Applied drop-down, select Yes.
Allowance Applied Mid-Year-
Select No if you started claiming the allowance at the beginning of the tax year.
- The allowance reduces your Employer NI contributions.
If you began receiving the allowance halfway through the tax year, choose Yes.
- You can claim the amount you would have received from the start of the tax year up to that point.
- This amount offsets your Employer NI liabilities.
- Any money left over can be deducted from PAYE obligations.
Allowance Used-
- Enter the correct value carefully. Payroll uses this number to calculate how much allowance you can still claim in the current tax year.
- A wrong value may cause overclaiming, which can lead to action from HMRC.
Additional steps
Although the setup wizard is complete, there are still additional tasks to review.
Employer
If you have an Auto Enrolment pension scheme, you’ll need to set it up separately in the program.
This step isn’t included in the migration process, and you can’t add year-to-date figures for pensions.
Employees
Set Employee’s Workplace Pension Status
Example: Enrolling an employee
- Go to the Employee tab.
- Open the relevant employee record, then select Edit.
- Select the Workplace Pensions tab.
- In the Workplace Pension section, open the Status drop-down menu and choose Enrolled.
- Enter the correct Enrolled Date.
- Select Save to update the record.
Frequently Asked Questions:
What do I Need to consider before Migrating Data in Sage 50?
By keeping in mind the following points, you can avoid possible issues related to data migration in Sage 50:
1. Make sure your data is error-free.
2. You must run your file on Sage.STO.ServerMigrator.exe. Do not run it on Sage.STO.ServerDataMigrator.exe.
3. Take proper backup of your data.
4. This tool works with accounting updates 6.3 and higher. Therefore, you must upgrade the software at least to version 6.3 before initiating the migration.
5. Before starting the migration process on a new server, check the administrative rights for the server. Also, do not forget to minimize the read permission in the old server.
How can I Migrate my Data with the Sage Migration Tool?
With the Sage migration tool, you can easily move data to a new server. Here are the steps to follow:
1. Log on to the new server as an admin.
2. Install the Sage Timberline Office Accounting. On the new server, it will grant you access to the Sage Migration Tool.
3. Next, browse to C:\Program Files (x86)\Timberline Office\Shared).
4. Now start the Sage migration tool.
5. Run the Sage.STO.ServerMigrator.exe program.
6. Click on the Browse tab.
7. Next, go to the old server and locate the 9.5 folder.
8. Click on the Validate button to validate the old server location, log file path and new server location.
9. Press the Migrate button to start the migration.
10. Once complete, click the Close button.
11. Review the Server Migration Log. It is usually located in the path- \\[servername]\Timberline Office\9.5\Accounting\Migration\. It will let you check if the material got migrated properly.
How to Fix the Data Migration Error in Sage 50?
When you receive an error message related to a failed migration process or Data migration error in Sage 50, invariably you will receive a prompt as well. In all such cases, you should select Yes. This will convert all the companies before working with the company codes and modules.
Next, perform the below-mentioned steps:
1. Type in your Company Code in the text box provided.
2. Press Enter.
3. Go to the upper right corner and click on Convert.
4. Open the module named Convert Module Information Files.
5. Here, checkmark the box named “Convert information for All Companies”, if you want to convert all the companies in one go.
6. Click Proceed to initiate the conversion.
7. Once completed, you will get a prompt saying “Data conversion is complete.”
8. Click OK to continue.
9. Click on the Accept button. This will close down the Company Maintenance window.

Guide on Sage 50 Payroll Email Payslips: Setup, Troubleshooting, and Testing
Introduction Sage 50 is one of the most popularly used accounting software that assists businesses to manage their financial operations....

Payroll Data Migration in Sage 50
In addition to the regular accounting functionalities, the Sage software provides highly efficient services for Data Migration. In this blog,...

Setup Sage 50 Direct Deposit Payroll
Payroll is a critical part of any business’s financial operations. It needs to be run efficiently and accurately so that...
 ChatGPT
 Perplxicity
 Claude
 Gemini
 Gork
Gork