How to Add Users to Sage Drive

Updated On: February 19, 2025 12:04 pm

Add Users to Sage Drive

Would you like to include the clients into the Sage drive yet don’t have the foggiest idea how? We are here to enable you to out in this procedure of adding the clients to the Sage drive. Sage drive is where Sage clients can spare their information that can be shared with the clients. Clients who are sharing the Sage record or you can say multi-client can share the drive. For sharing the drive you have to pursue a few stages. These means are given by our specialized group who gives us the arrangement so we can undoubtedly enable you to out in the entirety of your glitches.

users to Sage Drive

Read More : How to Add Users in Sage

Easy Solution to Add users to Sage Drive

The process for adding the user to the Sage Drive is as follows:-

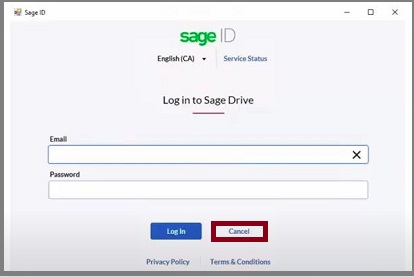
  • Firstly, open the Drive of Sage company
  • In this, you can easily add or manage users
  • Go to the File menu and then select the Sage Drive from the options
  • After that, select the Manage User Access
  • Select the option of Add User so that you can add the user with whom you want to share your data
  • Enter the information of the user. Note you cannot edit the information like user name or email address once it is saved
  • Mention the correct user details
  • After this, to share the details you need to select the company or companies
  • Now click on the Save button to proceed
  • For Sage drive, the user will receive an email when you invite them
  • If the users do not have a Sage ID whom you added to the drive
  • Then they need to create one and if they have then they can easily access the company data.

Note: You are eligible to add four users and one accountant user. The total number of users doesn’t fit with the license agreement of U.S Edition Sage 50.

Important Note:

  • To access the Sage Drive you the high-speed Internet is required.
  • The requirement of the file size for Sage Drive Company is maximum 5GB.

To Create a New User with Remote Data Access

  • Start by launching the Sage 50 Accounts
  • Now, log in as MANAGER.
  • Next Click Settings
  • After this click User Management 
  • Now click Users.
  • In case you see the Sage 50 User mappings window, click Skip.
  • Now Click New.
  • Click the user type that you need. 
  • Click Continue, next enter the needed details.
  • Click Continue then select the checkboxes to the areas the user can access and click Continue.

Note: This window doesn’t apply to administrator users as they have full access by default.

  • Now Click the Allow Remote Data Access check box.
  • Next Enter the user details 
  • Now click Continue.
  • Check the User Summary, click Save then click Close.
  • When prompted, log in to your Sage Account and enter the verification code.

Contact your User

Now that you have granted the user access to your data remotely, they will receive an email inviting them to access the company.

What is required:

  • The Sage 50 Accounts Version Number – This is the version that needs to be installed inorder to access the data
    NOTE: The user can easily locate this within the Help then About in your software.
  • Sage Account – The user requires a Sage account using the email in step 8 if they have not already
  • The Passphrase for your Data – This is the password that the user has used when you originally uploaded the data
  • The Username and Password the user set up for them to access Sage 50 Accounts

In order to support the new user with accessing the data remotely share the guide on Accessing the data remotely or email the guide.

Sage Drive Multi-User now available for Sage 50cloud – U.S. Edition!

Sage Drive Multi-User is a collaborative tool that assists the user and their co-workers in the same office or across the country to be able to access the real-time data within Sage 50 cloud.

Sage Drive Multi-User within Sage 50cloud now allows the purchasers of the multi-user edition to read write new and existing transactions within the Sage Drive company data files.

Whether on a Local Area Network (LAN) or working remotely, the users can easily work in and access a shared Sage Drive company. Previously, this was only confined to allow one user to work in a shared company while all other users access the company in read only mode. But you have the Sage Drive Multi-User is here to the rescue!

In order to use the Sage Drive Multi-User, ensure that you have or perform the task below to ensure Multi-User works properly for you:

  • Sage 50cloud version 2019.0 or beyond has been installed on the user’s computer
  • Every Sage 50 user accessing the company is required to have a unique Sage ID
  • A high-speed internet connection is necessary (For best performance a download speed of at least 20mbps and an upload speed of at least 10mbps are recommended. At a minimum, a download speed of 20mbps and an upload speed of 5mbps are needed.)¹
    • For companies less than 500 megabytes that do not use inventory or multiple lines on transactions an upload speed of 5mbps is generally enough.
    • For companies greater than 500 megabytes that do not utilize the inventory or multiple lines for transactions an upload speed of 10mbps or more is advised for best performance
    • For all companies using inventory and/or multiple lines within transactions an upload speed of 10mbps is recommended for best performance

Note: The data size limit for Sage Drive Companies is 5.3GB, which also comprises of attachments and archives

  • In case the database size is larger than 5.3GB, one can use the purge method to minimize the database size
  • In order to test your current internet speeds, launch an internet browser and go to Google.com and search for “Speed Test”

Save time speeds will differ according to the configuration, size, number of concurrent users, system, and network traffic but will be much slower as compared to saving to the cloud than when saving locally.

Set up Access rights, logon Names and Passwords for additional Users

In case you have more than one-user processing in Sage 50Accounts, one can set up individual users for every user to log in with. By doing this you can easily maintain track of every user’s activity within the software and if needed, control which areas of your accounts they can access. 

Within the network versions of Sage 50 Accounts, setting up individual users allows more than one user to process the details at the same time.

It is also easy to create and set up these additional users, that we explain in the section below.

Switch on Access rights – Single User only

In case you have a multi-user version of Sage 50 Accounts, access rights are enabled by default. Nevertheless within the single-user versions one will have to enable this manually:

  • Start by Clicking on Settings 
  • Next click Company Preferences
  • Now click Parameters.
  • WithIn the Others area select the Access Rights 
  • Now check box then click OK.

The default logon name is manager with no password. In case you have previously utilized a password when accessing Sage 50 Accounts, one should use this password with the manager logon. If you have forgotten, then you can reset your manager password.

To Create a New User

  • Start by Logging into Sage 50 Accounts as manager.
  • Next click Settings
  • Now, click User Management and click Users
  • Next Click on New and shut the required user type:
    • Standard: One can grant access for a standard user according to their role
    • Accountant or Bookkeeper: Grant access to the company data, allow them to create and manage other Accountant or Bookkeepers user types
    • Administrator: This user has complete access to the company data and can perform all functions.
    • Read Only: The Sage 50 Accounts v28.1 and above – This user has read only access to the modules listed within the level of access section
  • Now click Continue.
  • Next Enter the following details:
  • Complete the Create New User window as follows:
  • For this click Continue and click select the areas within the software you wish the user to have access to.
  • In order to do this, select the boxes for the required areas.
    • Click on the arrow located next to an area inorder to specify the access to the specific functions within that area.
  • In order to grant access to all areas, click Select All then click Continue.
  • In case you have a Remote Data Access setup, if needed click Allow remote access to give this user access to connect to the company data remotely.
  • Next check the User Summary, then click Save.
  • The user will be displayed on the list, which states their User Type and Level of Access. To exit this window click Close.

Steps for Sage 50 Accounts v26 and below >

  • Start by Logging into Sage 50 Accounts as manager.
  • Within the menu bar click Settings t
  • Next click Access Rights and click New.
  • Now Complete the Create New User window as follows:
  • Finally click OK then click Close.

Amend Access Rights

The user can amend every user’s access level, allowing or restricting access to certain software areas as needed. Nevertheless, be aware that it is only possible to set up read only access in v28.1 and above.

Steps for Sage 50 Accounts v27 and above >

  • Start by Logging into Sage 50 Accounts as manager.
  • Next click Settings 
  • Now click User Management and click Users.
  • Next Select the user whose access rights you wish to amend 
  • Now click Edit.
  • Click the needed option you wish to amend on the left:
    • User Type : Select the type of user
    • Profile : To change the password click Change Password
    • Level of Access : To select the areas with in the software you wish for the user to have access to
    • Remote Access : To amend the user’s remote access settings. This is how to allow a user to access data remotely using Remote Data Access
    • Confirmation : To be able to view the User Summary for the user.
  • After complete, click Finish then click Save.
  • You will return to the User list, to exit this window click Close.

The Steps for Sage 50 Accounts v26 and below >

  • Start by Logging into Sage 50 Accounts as manager.
  • Next Click Settingsthen click Access Rights.
  • Now Select the user whose access rights you wish to amend then click Edit.
  • Go to the list of software modules, now select or clear the relevant check boxes according to the access you wish to give to the user.
  • In order to give access to part of a particular module, to drill-down into the module click the adjacent plus sign. The list expands and one can also select or clear the sub-categories as required.
  • Finally click OK then click Close.

How to Activate Sage Drive for Remote Access

In case you have just bought the Sage 50cloud 2020 software and wish to activate the Sage Drive feature following are the steps to do this:

Section I: New Customers must Create a Sage ID

  • Launch a company
  • Now Select File, Sage Drive, and then select Share Company
  • Next Select Sign up now
    • Now Enter the requested details to create your Sage ID
  • Now Select Create
  • Go to your email, select the Sage ID Activation link
  • In case you are the user who will be sharing a company, select Register
  • Within Sage, select File, Sage Drive, and then select Manage User Access (Management Center)
  • Now Enter Email address and Password
  • Finally Click Sign in and you will get a message stating the activation is complete

Section II: If/once you have an existing Sage ID

  • Launch a company
  • Now Select File, Sage Drive, and then select Manage User Access (Management Center)
  • Next Log into your Sage ID
  • After it has been activated you will be able to share a company, manage users, or stop sharing a company from the File, Sage Drive menu in Sage.

Note: Sage 50cloud must be activated before you can access Sage Drive under the file menu.

Also Read : Sage Multiuser Setup

Final Words

In this, we have discussed the process of sharing Sage Drive with users or add new users. You need to follow the steps accordingly to get it done. For any queries or issues you are just a call away so, dial Sage 50 support number or Talk on our Sage 50 chat support. The team is always here to help you out and give you the best assistance by providing great solutions.

Accounting Professionals & Specialized Experts

Want quick help from accounting software experts? Get in touch with our team members who can install, configure and configure your software for you. Proficient in fixing technical issues, they can help you quickly get back to work whenever you encounter an error in Sage software. Our team is available 24/7 365 days to assist you. To get in touch.

Frequently Asked Questions (FAQs)

Can we have more than one User in Sage?

Yes, with the help of the multi-user license, you can have multiple users work on your company data at the same time. This is the case when you have installed onto your network and you run your company in a multi-user mode.

How to Add Users to Sage 50?

For this, you need to follow the below steps:
1. Log into Sage 50 Accounts as the Logon name MANAGER.
2. Next, Click Settings
3. Now click User Management 
4. Next, click Users
5. Select click New 
6. Now click the required user type 
7. Finally, click Continue.

How to Enable Multi-User Mode in Sage 50?

To switch to a Multi-user mode, you need to:
1. Go to the Home window within the File menu
2. Click select on Switch to Multi-User Mode.
3. Finally, Click Yes.

Adding Users
If and when you need to add users to the Sage you can follow the below steps:
About Remote Data Access
Prior to using this feature, you need to follow the below steps: 
1. Make sure you have Sage 50 installed on your system and have an active subscription that also comprises Remote Data Access.
2. The user needs to be the data owner.
3. The user must have an active Internet connection.

Access to Data from anywhere
1. With the help of Sage Drive, also called Remote Data Access, one can easily upload and share the Sage 50 company file. In case you need to work with certain data but are not at the office, you can also access it from any other location.
2. As one can create and adjust the transactions, the Sage 50 company file is synchronized with the shared company so that the data is never out of date. In case you regularly work with an accountant or bookkeeper, you can easily have your company file shared with them with little to no disruption to your business.

What is Sage Remote Data Access & how do I to set it up?

Previously  known as Sage Drive – Sage remote access is a cloud service that allows  you to share your company accounts data securely. This implies that  you and other users can also access the company accounts data from anywhere: whether this is at home, in the office, or on the move.

Related Posts

Further Reading