Unable to Run Sage 50 Accounting Setup in Server : Guide

Are you looking for a comprehensive guide on how to set up your Sage 50 accounting software in server mode? Look no further! If you’re having trouble running the Sage 50 Accounting setup in your server, there are a few things you can try to get it up and running. In this blog post, we’ll go over some of the possible causes of this issue and how to fix them.
User Navigation
Usually, we are accustomed to running the Sage accounts data service either on a server or within the Sage 50 cloud account-related data. Nevertheless, there are times when you might come across the situation of being unable to run sage 50 accounting setup in server. But before we get into the issue of the arising error, it is worth taking a look into the various aspects of the Sage 50 software.
This is one of the most sought-after accounting software that has been an asset to small-scale businesses in helping them deal with their various financial requirements. Be it bookkeeping, invoice formation, data handling, reading and writing of data, data analysis, security for the same, and performance optimization is all ensured by the software. However, Sage 50 is not free from errors, and unable to run Sage 50 accounting setup in server is one of them. So, what are the reasons for the occurrence of the error? Let us take a look.
Reasons for the Unable to Run Sage 50 Accounting Setup in Server
Some of the prime reasons for the error to occur are as follows:
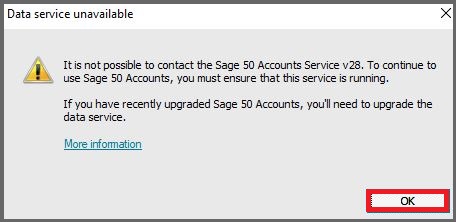
- The unavailable data service on a system
- Issues with Internet connectivity
- Wrongful configuration with the Firewall
- Corruption of the queue. Dta file.
- Wrong network password
- Damaged files within the (.Net) folder
If you are unable to run the Sage 50 Accounting Setup in Server, there could be several reasons for this. Some common reasons and their solutions are:
- Insufficient Permissions: If you do not have sufficient permissions to run the setup file, you may encounter errors. Ensure that you are logged in with an account that has administrative privileges on the server.
- Firewall and Antivirus: Sometimes, the firewall or antivirus software installed on the server may block the setup file. Temporarily disable your firewall or antivirus and try running the setup again.
- Compatibility Issues: The Sage 50 Accounting Setup may not be compatible with the server operating system. Check the system requirements for the Sage 50 Accounting version you are trying to install and make sure your server meets those requirements.
- Corrupted Setup File: If the setup
Read More-: Sage 50 Cannot Connect to your Sage 50 Company Data Location
How to Fix Unable to Run Sage 50 Accounting Setup in Server
Solution 1: To Fix the Error
The data services of the Sage accounts are responsible for determining the incorrect versions or obstacles during the regular running of the system with the help of Sage 50 cloud Accounts data. Following are the steps to resolve it:
- Start by making sure that the advanced update has been installed on your system with the data.
- Next, restart the system along with the data related to the Sage 50 accounts. If the error continues then you need to ‘Run’ the program (Windows Key + R on the keyboard)
- Enter ‘services. msc’
- Click on OK
- A list will be displayed comprising services such as Accounts v25, Sage Accounts v28, Sage Accounts v24 and Sage Accounts v26.
- There are times when the services displayed might be disabled. For this, you need to right-click on it and select Properties.
- Click to activate the drop-down list ‘Startup’ and click on the ‘Automatic’ option
- Click on OK
- In case of every service requirement, you will need to Right-click on the required option and Click on the Stop option
- Now, restart again
- Click the Start tab
Solution 2: To Locate the (.NET) Folder to Delete the Data
To do so, you need to follow the below steps:
- Certain installation errors can be resolved by simply clearing the (.NET) folder.
- Search by following the link: C:\Windows\Temp\.net
- Select all the files and folders within the folder
- Click on Delete to eliminate all the files
- Click on the Yes option.
Solution 3: Network Password Verification
To do so you will need to:
- Launch the client system
- Click to display the Run Window
- Enter \\ & server IP address
- Click on OK
- This will display a new Window
- Enter the network password
- Now launch the Sage Account
- Start the Firewall Configuration
- In case you still get an Error message you will need to start the Firewall configuration once again
- Ensure that the Firewall prevents the blocking of the data service of the Sage Accounts
- Now check if these ports are active:
- Sage Accounts v28
- Sage Accounts v27
- Sage Accounts v25
- Sage Accounts v23
- Sage Accountsv22
- Sage Accountsv21
- Next, you need to verify if the ports can be configured for the certain IP address
- Now you need to add the server to add the IP address for the client system.
- For the inbound or outbound rules into the Windows Firewall you need to follow the below steps:
- Click to launch the Windows
- Click to select the Control Panel Window
- Click on the Systems and Security option
- Click on Windows Firewall
- Select Outbound rules to add the same
- Select on New Rule option
- Click Port tab
- Click on TCP and the required local ports
- Enter the correct Port Numbers
- Select Port Numbers
- Click on Next
- Click on TCP and the certain Local port
- Enter the required port numbers: For example 34228, 32228 for Sage 50 Accounts v28
- Click on Next
- Select: checkboxes public, domain & private
- Enter the name and rule description: Sage Data service
- Click on the Finish option
Solution 4: Deleting the Read-Only and Hidden Attributes
To do so, you will need to:
- Find and locate the company’s folder address
- Click on the Start option
- Click on Run and press CMD
- Click on the Enter key
- Enter the CD and the data path
- Enter attib –h –r/S/D
- Click on Enter
- Close the Window and the command prompt
- You are done
Also Read-: Sage 50 Cannot be Started Error
Final Words
Setting up Sage 50 Accounting in Server is a simple process that can be completed in just a few steps. First, you’ll need to download the software and install it on your server. Next, you’ll need to create an account and set up your preferences. Finally, you’ll need to activate the software so that you can start using it. Once you’ve completed these steps, you’ll be able to use Sage 50 Accounting to manage your finances with ease.
Accounting Professionals & Specialized Experts
Want quick help from accounting software experts? Get in touch with our team members who can install, configure and configure your software for you. Proficient in fixing technical issues, they can help you quickly get back to work whenever you encounter an error in Sage software. Our team is available 24/7 365 days to assist you. To get in touch.
Frequently Asked Questions(FAQs)
How to view the Mapped Drives on a System with UNC pathways
In order to view the mapped drives on a System with UNC pathways you will need to:
🔹 Launch the RUN window
🔹 Enter cmd and right-click on the file with the name (cmd.exe)
🔹 Enter RUN as the admin option
🔹 Enter Net use
🔹 Click on the Enter option
🔹 This will display the system-mapped drives
🔹 Enter the ‘MSlookup’ as the server name to get the IP address of the server
How to Run the Sage 50 in Admin mode?
To run the Sage 50 in Admin mode, you will need to:
🔹 Find the Sage50 icon and right-click on it
🔹 Select the Properties tab
🔹 Click on the Compatibility mode
🔹 Click on the Privilege level
🔹 Select ‘Run’ as the administrator option
🔹 Click on OK
Is there a Possibility for the Data folder Security Permission to become the main reason for the Data Service Error?
Yes, the data folder security permission can be the reason for the Data service Error. When this happens you need to:
🔹 Click to open the Client system
🔹 Click to launch the Sage Accounts
🔹 Now, click to get the ‘Select company page’
🔹 Locate the folder that contains the data folder
🔹 Once you get the data folder you will need to right-click on it
🔹 Click on the Advanced option and select ‘Change Permissions
🔹 Next, click on Add and select the Object Types and click on the box ‘Include Service Accounts’
🔹 Click on OK
🔹 Next, you need to enter the system in the field for ‘Enter object name to select
🔹 Click on the ‘Check Names’ option
🔹 Select ‘Systems’
🔹 Click on OK
🔹 Click on Apply and select ‘Full control’
🔹 Click OK